No products in the basket.

Soldering Pot Maintenance and Inspection Method
To ensure long life
| Soldering Pot Maintenance Method TOP | |
| POINT 1 | Check the life of the solder pot (Daily inspection) |
| POINT 2 | Method for setting correct temperature (offset value) |
| POINT 3 | Cautions during work |
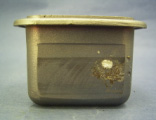
Note that solder pot is a consumable part. If the solder pot is used for a long time, it may become corroded by solder, causing holes and solder leakage. In order to perform safe and comfortable work, check the corrosion conditions of the solder pot before start of work and replace it with a new one at an early stage.
Be sure to work while the solder pot is cool.
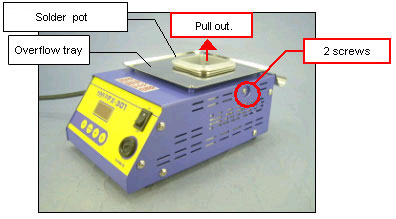
1. Loosen the 2 screws on both sides with the included hexagon wrench and pull out the solder pot
When pulling out, remember the direction of the solder pot.
2. Check that no solder leakage is observed in the solder pot tray located inside the main body.
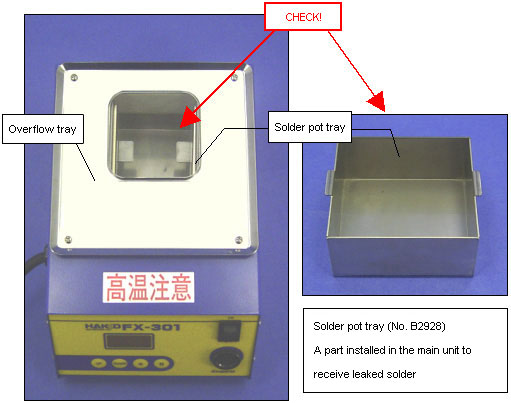
If solder leakage is observed, replace the solder pot with a new one.
3. Check that no solder leakage is observed at the 2 left and right sections around the heating elements inside the main unit and around the heat insulator.
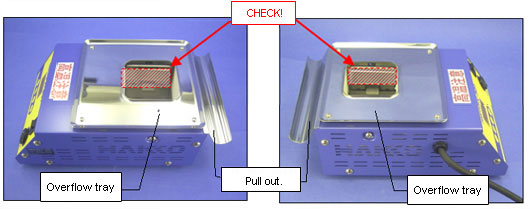
If solder leakage is observed, replace the solder pot with a new one.
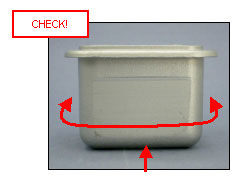
4. Check that no solder leakage or holes are observed on the surface of the pulled-out solder pot.
Visually inspect the side and bottom surfaces.
if corroded:
Solder in the pot will gradually leak from the hole. (It does not flow out quickly like water.) Always pay attention to the decrease in solder in the pot
5. If no solder leakage is found, reinstall the solder pot into the main body.
Tighten the 2 screws on both sides with the hexagon wrench. If a mounting screw is loose, heat transfer becomes poor.
When reinstalling the solder pot, if it is rotated 90° from the pulled-out direction before reinstalling, the life of the solder pot will be extended.
If solder leakage is observed, purchase a new solder pot and replace it with the new one.